The world's most read coffee and espresso resource

AeroPress Iced Coffee How To

We take one of the world's favourite brewing devices, the AeroPress, and make iced coffee with it!
Share This How To

IntroductionAeroPress Iced Coffee How To

Iced coffee in various forms and formats – even in specialty coffee – has become a major trend in the past decade, though it has been around for much longer. The current trend started with Iced Coffee Towers coming over as part of the “all things Japanese coffee” wave that Hario with the V60 started.

Japan has had a very long trend of iced and cold coffee beverages, even selling them in vending machines via canned products. This enticed several major specialty coffee roasters in the USA to do the unthinkable even a decade before: can up their coffee in a cold form to put on grocery store shelves.

It is CoffeeGeek’s official opinion that canned coffee is horrible. It is not specialty coffee, and not worth the price often charged for it.

That doesn’t mean iced and cold coffee isn’t bad. In fact, it can be fantastic. We have several guides on iced and cold brew coffee and espresso, all designed to give you a superior beverage experience to the overpriced grocery store cans. This search will deliver them all, or you can read some individually: our Iced Espresso How To, Vietnamese Iced Coffee guide, Ice Tower Coffee Maker How To, Japanese Iced Coffee Method, and even How to Use a Hario Pota. Be warned, some of these methods can take hours to do.

In this guide, we present one of the fastest ways to make Iced Coffee, using an AeroPress. The actual brew time is under 90 seconds, and the total time to make it is under 4 minutes. It’s also very tasty.

What You Need for this How To

  • You don’t need much to brew with this method. You’ll need
  • An AeroPress
  • An optional Flow Control Cap for the AeroPress
  • A good grinder (even a manual grinder like a Timemore C3 Pro will do)
  • Good, fresh coffee
  • A scale (or measuring spoon)
  • A metal filter (it makes better coffee)
  • A sturdy glass
  • Ice (made with filtered water)

Gear and Coffee Used
Subscribe Today
COFFEEGEEKNEWSLETTER
Join the 12,850 other coffee lovers who receive CoffeeGeek's premier newsletter. Each issue dives deep into one coffee or espresso based subject. Subscribing is free, and your personal information is never shared.​​
Newsletter Signup
RANCILIO SILVIA PRO X
redefining a classic
dual boilers, pid, preinfusion and more

Get it at
1st in Coffee

CoffeeGeek's
preferred
vendor for
all things
Rancilio

Step by StepGuide

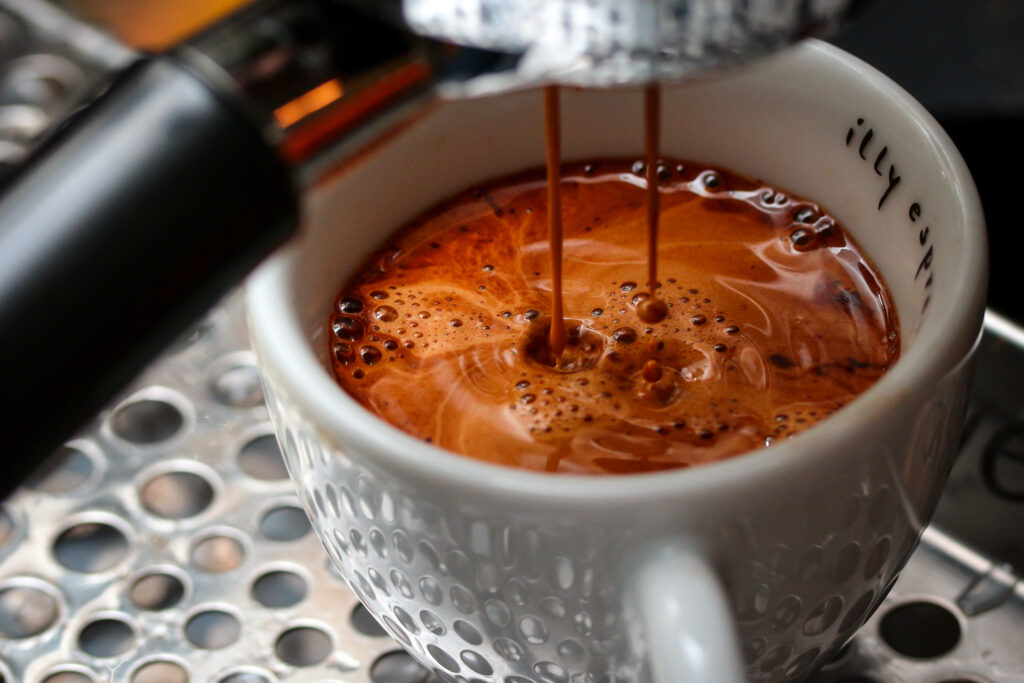
Brewing Iced Coffee with the AeroPress

This is one of the fastest, and most efficient ways to make an iced coffee. The final ratio of coffee to water is around 14:1 (once ice has diluted the drink), and because you’re using hot water to craft the brew, all the coffee’s best elements, including acidity, make it to the cup.

Front Page

Time Needed: 3 minutes

Equipment Cost $ 135
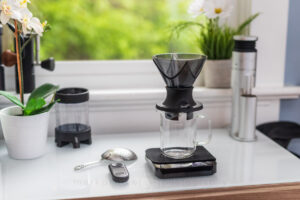
Necessary Supplies

Fresh Roasted Coffee
Filtered Water
Ice Cubes

Necessary Tools

AeroPress ($40)
Good Grinder ($80 minimum)
AeroPress Metal Filter ($15)
Kettle ($15 minimum)
Optional Kitchen Scale ($15)
Optional AeroPress Flow Cap ($25)
Stirring Spoon

Iced AeroPress Steps

The Parts Needed

For this iced coffee brew, you’ll need an AeroPress, a filter (we prefer using the metal Able DISK filter), a strong glass, freshly ground coffee, and water just off the boil. Milk/cream and/or a sweetener are optional. We’re using the oldest AeroPress we have: it’s an original prototype AeroPress from 2005, in this step by step.

For making a cold brew you'll need the aeropress, a filter (we prefer metal ones), a strong glass, fresh ground coffee and hot water. Milk and/or a sweetener are optional.

Inverted Brew Method

Unless you have AeroPress’s Flow Control Cap (a $25 option) for your AeroPress, this method requires using the Inverted Brew Method. Partially assemble the plunger into the main brewing tube, sticking the plunger in about 1cm and then rest the entire device on its plunger end.

Using the AeroPress Inverted

Adding the Coffee

For this iced brew, we’re going to be using a 5:1 ratio of coffee to water (or 20g per 100ml). In this case, we plan on using 150ml of brewing water, so we’re going to add 30g of coffee to the inverted AeroPress. It is grind to the consistency we’d use for a V60 paper filter brew (which is coarser than a standard AeroPress grind).

Adding the Coffee

A Lot of Coffee

This is more than double the amount of coffee one would use normally in an AeroPress. The idea here is we’re making a highly concentrated coffee, which will be diluted in real time by ice in the cup below.

A Lot of Coffee

Adding Hot Water

Our filtered water is just off the boil, and is around 95C (200F) when being poured into the AeroPress. Only 150ml is being poured (in the case here, we’ve used a pre weighed insulated container to pour the water from; you could also place your AeroPress on a scale to measure the water volume).

Adding Hot Water

Stir in Stages

We’re going to do a 60 second stir to agitate the coffee slurry, but in stages and very defined steps, so we don’t overly extract bitters. Give it a 5 second stir, then pause 10 seconds. Stir once or twice again, and pause another 10 seconds. Continue 4 or 5 times more doing this.

Stir in Stages

Add the Filter and Cap

As soon as your stirring action is done, add the filter and cap to the brewer, and let it steep for about 30 seconds. But definitely experiment with this steep stage: try longer times, and even shorter times.

Add the Filter and Cap

Add Ice and Flip

As the coffee continues to steep for 30 seconds or so, add your ice to your glass to fill it up. Make sure your glass is strong. It’s going to bear a lot of weight soon. We like using big chunks of ice for this method. Once the glass is filled, Very carefully place it upside down (trying to hold the ice in place) on the AeroPress. Then, very carefully flip everything over.

Adding Ice

Plunge Down

Once you’ve flipped the Aeropress and cup, start plunging. Be careful though: because of the increased volume of coffee and extra agitation, it may be more difficult to press down. Really exercise caution and common sense here.

Plunge it Down

Finished Plunging

This is an important step to preserve good balance in the finished brewed coffee: as you finish plunging the AeroPress, keep a bit of the airspace between coffee and the plunger. Doing this, you keep the bloom out of the cup, which can lead to more bitters in the final brew.

Finished Plunging

Adding Milk (Optional)

This is optional, but we find the sweetness from half and half (10% fat) milk really gives a boost to the cup. We don’t add too much, but you can do it to taste. If you prefer, add a half teaspoon of sugar to the cup to add sweetness to the drink’s balance (and stir quite a bit, as the sugar will be slow to dissolve)

Adding Milk

Stir and Serve

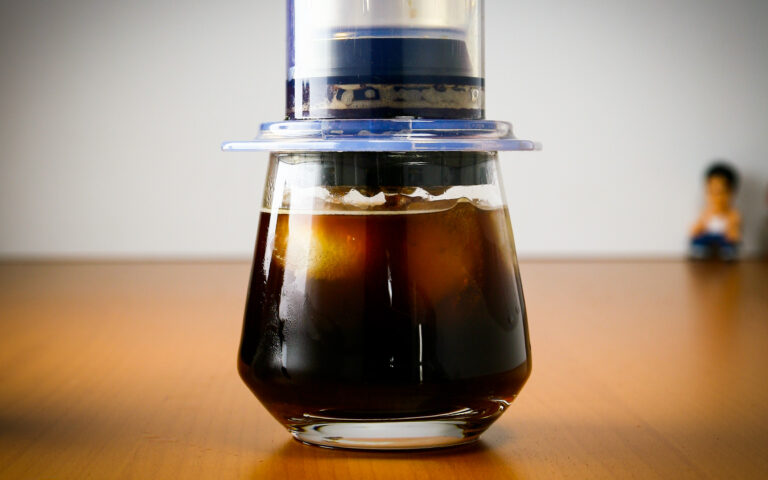
Stir the brewed coffee until you start seeing condensation on the glass, and serve. Quite tasty!

Stir and Serve

The AeroPressand Brewing Cold Coffee

We all know the AeroPress is an excellent travel and individual serving coffee brewer – brewing up to 250ml with the standard model – and millions of people have bought one over the years. One of the reasons why is just how versatile and quick a brewer it is. Most techniques can get the entire brewing time down to 2 minutes or less, and whether you use it traditionally or via the Inverted method (or with AeroPress’ new pressure cap), it produces an excellent brew.

You could hypothetically brew in the AeroPress with cold or room temperature water, and just let the dwell time increase to five or ten minutes. That’s a fun experiment and I encourage you to try it out: the simple recipe remains using a 20g/100ml ratio of coffee to water, but grind it even coarser, and either use AeroPress’ pressure cap, or the inverted method. Add room temperature water to the ground coffee, give it a good stir, and walk away for 10 minutes. Then complete the brew.

In our How To, we go the traditional brewing route, using hot water to create our elixir extraction. We’re also using the Inverted Method (more on that below), but changing up a few things, given that the coffee will be heavily diluted by ice. Here’s what is changed in this recipe, and the reasons why.

Amount of Coffee: When brewing a traditional cup of coffee with the AeroPress, CoffeeGeek’s advice is the 14:1 ratio, or 7 to 7.5g per 100ml. That differs from the AeroPress manual, but it delivers the best balance, especially when using the inverted method. But when it comes to brewing over ice, we want a more concentrated extraction, so we’re using a 20g to 100ml ration or 5:1. It’s a lot, but the cup taste will prove you’re on the right track. Keep in mind, this can be diluted by as much as 2:1 ratio by ice, so by the time the brew is complete and you have liquid in the glass, the ratio overall is around 15:1 liquid to ground coffee.

All this said, feel free to play around with the ratios. But keep in mind, only use about 200ml or less brewing water in the AeroPress (which can result in a 500ml drink once done). Adjust your grind to suit: you can use up to 40g of coffee, by try it with 35g/200ml, or even 30g/200ml.

Type of Grind: Because we’re using a larger volume of ground coffee, try using a grind that’s slightly coarser than a standard AeroPress grind, but one that is still finer than a V60 grind. If you are using metal filters in your AeroPress go coarser to a proper V60 grind level.

Brewing Volumes: For a traditional Aeropress brew, we typically use about 250g (ml) of hot water for our 18g dose of coffee (ratio of 7g coffee/100g water, or 14:1). But when brewing for coffee served cold, you want to create more of a coffee concentrate. That means using less water (and agitating more – see below). For this demonstration and our 30g of ground coffee, we’ll be using about 150ml of water (5 fl.oz) that is at least 200F or higher. This is that 5:1 ratio mentioned above.

Feel free to experiment, keeping in mind your coffee will dilute to 1.5-2.5x the volume once the ice has done its job.

Brewing Times: In a traditional Aeropress brew, the steep (dwell) time is around 50-75 seconds with very little agitation at the beginning of the process. For our cold coffee brew, we’re going with a 30 second agitation session + 60 second steep session to fully extract from the increased volume of ground coffee. The goal is to extract a more viscous, dense concentrated liquid from the brew. You really have to play around with this though, because it is quite easy to over-extract and deliver an excessively bitter brew.

These are the main differences when using the AeroPress to make iced coffee. All the water you use – for ice and for the brewing water – should be filtered.

A Note onUsing Milk and Sweeteners

For many serious coffee lovers, doing the above recipe results in a balanced (on the coffee bitters side) beverage that they enjoy drinking. Because it uses a hot method and a lot of agitation, all the coffee’s usual acidity, complexity and yes, bitters come through.

The human tongue and ability to taste is very interesting. We can perceive four (five!) primary senses in taste: sweet, salty, bitter, sour, (and umami). Sweet and bitter are at play here in iced coffees. The colder something is, the less we can perceive sweets, and the more we can sense bitters. This isn’t universally true for all tasters, but for the vast majority, it is.

Because we perceive sweets less at colder temperatures, an iced coffee brewed traditionally may taste excessively bitter. This is where it’s perfectly fine to help out the coffee (and your taste buds) by adding some sugar to the cup at the start of the brew. You don’t need to add much: a half teaspoon or less for a 300-400ml total beverage size will bring the balance right back into check. Of course, if you want a sweeter beverage, add more.

Milk also can play a role here to soften the higher perception of bitters and the apparent lack of sweetness. Instead of sugar, add about 20-25ml of half and half cream to the finished cup. This too balances the drink and makes it much more enjoyable for most.

A Note onThe Inverted Brew Method

In the original version of this How To, we had an entire section on the Inverted Brew Method for the AeroPress, and how to perform it. Since then, we’ve published several articles on this style of brewing with the AeroPress. There’s our Inverted Brewing Method How To, and an article on the origins of the brew method.

It used to be that the best way to get a concentrated brew with the AeroPress for applying to ice was the Inverted Method. Since then, AeroPress themselves have come out with a Flow Control Cap that gives you the option of skipping the inverted brew method entirely, and using the AeroPress in the traditional fashion, right side up.

This is because AeroPress’ new Flow Control Cap effectively turns the AeroPress into a full immersion brewer; it holds back the flow of the brewed coffee, until you add the plunger piston and start pressing down on the brew. Given how the Inverted method can be slightly dangerous (especially when flipping the AeroPress right side up while holding a cup to the base), this is a better way to brew the AeroPress Iced Coffee method. It will cost you an extra $25 to buy the cap, however.

Connect with us on Social Media

Mark has certified as a Canadian, USA, and World Barista Championship Judge in both sensory and technical fields, as well as working as an instructor in coffee and espresso training. He started CoffeeGeek in 2001.

Revisions to this How To Guide

We first wrote about using an AeroPress for cold coffee brews back in 2008 in a featured article for a now-defunct magazine. We reprinted it on CoffeeGeek in 2009, as part of the content for an Opinion article.

The method proved so popular that we created its own How To in 2015. It was updated for our 2021 site relaunch, and once again updated for 2024, with new information about iced coffee trends and some instruction updates.


if you liked this how to, please consider
sharing it on one of these platforms; it helps us greatly!
How to Make an Americano

How to Make an Americano

February 10, 2025

Learn how to make the perfect americano, the drink Italians came up with to satisfy American tastes and requests for a “normal” cup of joe!

Read the Review
Best Manual Coffee Grinders for 2025

Best Manual Coffee Grinders for 2025

September 17, 2025

Find your ideal manual grinder in CoffeeGeek’s 2025 guide. Hands-on tested for consistency, value, and brew versatility.

Read the Review
The companies that make this website possible

CoffeeGeekSponsors